Setup Jacoco & Sonarqube in multimodule multiflavor Kotlin Android project

Prelude
The day has come at last! The day, when you are going to setup SonarQube in your Android project. And again, you are relying on google to lend you a helping hand, but this time it might not come that easy, because there is no copy-paste solution to take from the beloved stackoverflow.
At Disqo we are working on a multimodule multiflavor 100% Kotlin Android app. And the exact same day has came for us too. I’ve wasted a good amount of effort for simply writing a couple of dozen lines of code because:
- SonarQube docs are not straightforward: no clear understanding which properties should be used, which might be omitted
- Few examples for Android projects and if you find some, they would mostly be related to Java or would be using SonarQube properties that are already obsolete (e.g. sonar.jacoco.reportPaths)
- If you are lucky to find examples on Kotlin, then certainly they are solutions for single module projects
- or maybe I’m extra bad at googling 🤷♂️
Hopefully you will stumble across this article when trying to setup SonarQube on your project. Hopefully it will be helpful and will refrain you from wasting precious time! ⌛️
Agenda
We’ll first setup JaCoCo — a tool, which will help us generate coverage report for the codebase. This report will contain detailed information as to which classes/paths have been covered by tests, and which are not covered.
Then we’ll setup SonarQube, which will use the coverage report produced by JaCoCo.
Setting up JaCoCo
In topmost build.gradle add JaCoCo to classpath:
buildscript {
    repositories { ... }
    dependencies {
        ...
        classpath "org.jacoco:org.jacoco.core:0.8.6"
    }
}
Inside the project create jacoco.gradle file with following content:
Now inside each module’s build.gradle file apply the newly created jacoco.gradle as such:
apply from: "$project.rootDir/jacoco.gradle"Now you’ll be able to generate JaCoCo coverage report. Assuming flavor name is dev, a report might be created by performing:
./gradlew clean testDevDebugUnitTestCoverageSetting up SonarQube
You have to run SonarQube locally or on a remote machine. Setting that up is out of the scope of this post (that’s something that Google can certainly help with). For simplicity we’ll assume that we have Sonar running remotely on some host.
Then in root build.gradle add SonarQube to classpath:
buildscript {
    repositories { ... }
    dependencies {
        ...
        classpath "org.sonarsource.scanner.gradle:sonarqube-gradle-plugin:3.0"
    }
}
Inside the project create sonar.gradle file with the following content:
Let’s apply the newly created sonar.gradle to our project. We should add following line inside root build.gradle:
apply from: "$project.rootDir/sonar.gradle"Now we’ll apply sonarqube plugin to all subprojects using the subprojects DSL inside topmost build.gradle:
subprojects {
    apply plugin: "org.sonarqube"
    sonarqube {
        properties {
            property "sonar.coverage.jacoco.xmlReportPaths", "$projectDir.parentFile.path/app/build/reports/jacoco/testDevDebugUnitTestCoverage/testDevDebugUnitTestCoverage.xml"
        }
    }
}
As a result root build.gradle should be similar to this:
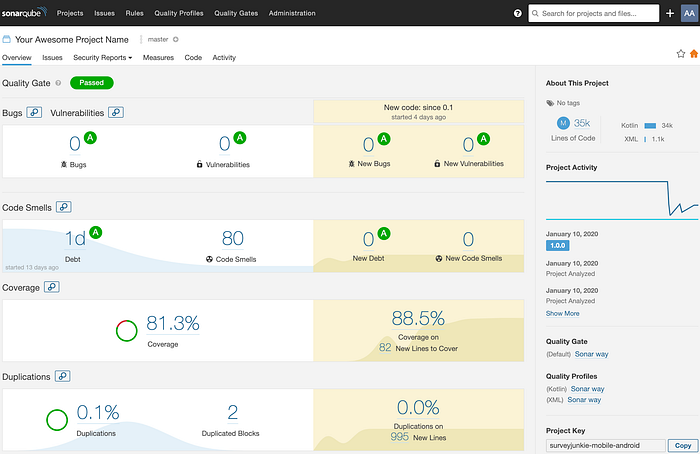
Here’s the result that we were looking for:
That’s it, folks! Feel free to reach out to me if you come up with a better approach!